By default Cognex cameras give many results in pixel values, this blog is going to detail how to calibrate your camera to give real world engineering unit results.
Additional Materials Required:
You will require a calibrated and verified sheet of graph paper and some calibrated measuring tools to verify results.
Process:
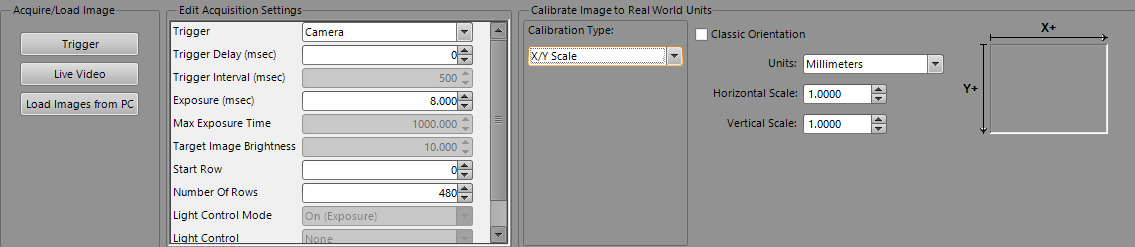
- Launch Cognex Insight software in "Easy Builder" mode.
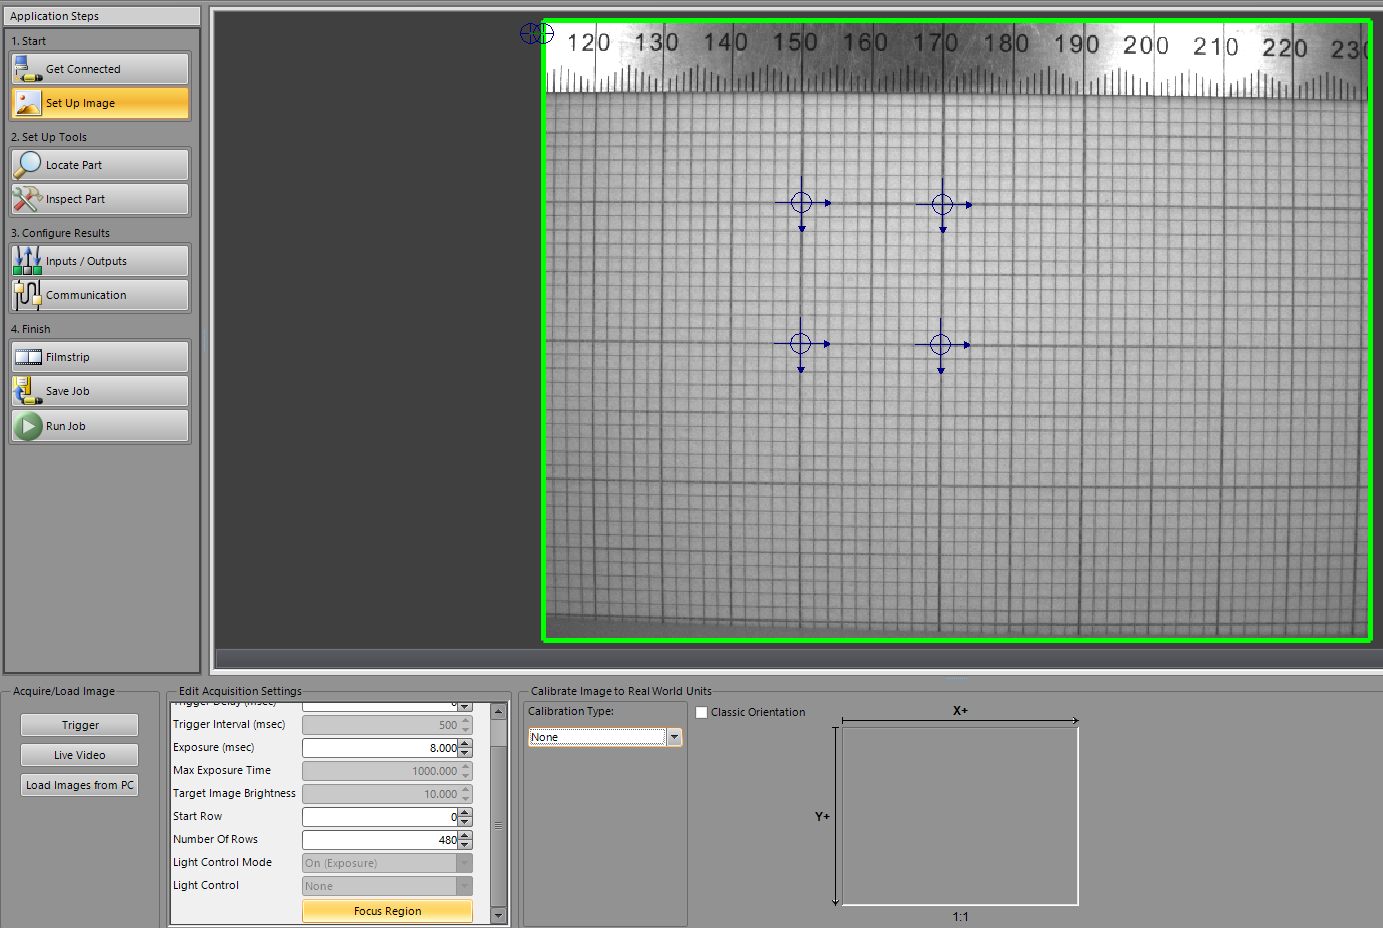
- Select "Set up Image" then "Live view".
- Place a sheet of grid paper in your Field of View and manually focus the image as required.
- Select "Trigger" image. This will take a snap shot of the image to use in calibration.
- Double click "Focus Region" button to prompt a magenta selection box.
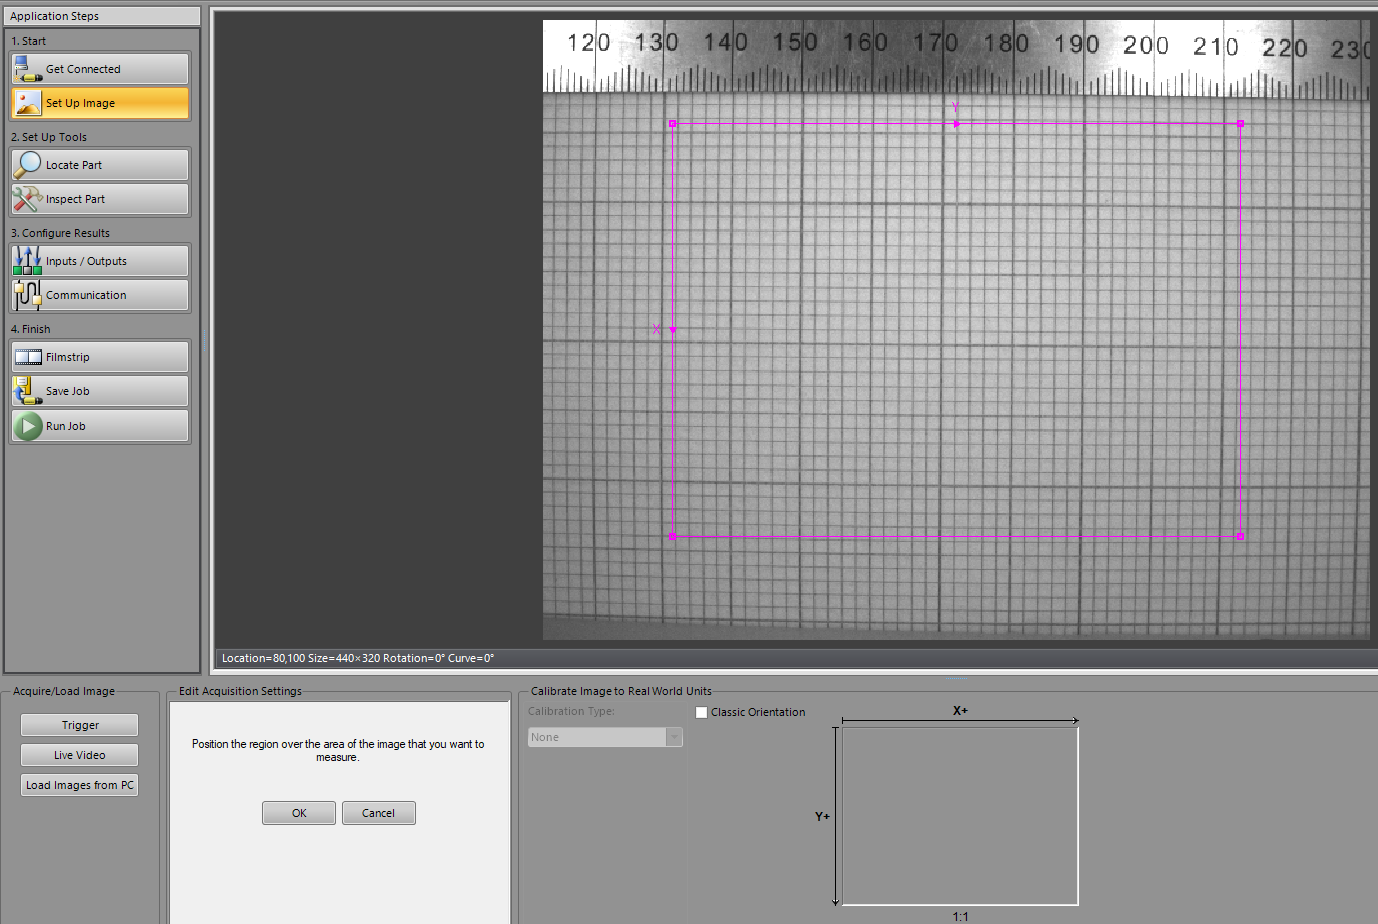
- Adjust this selection box to encompass a central chunk of 10mm boxes. Press enter or the 'OK' button when ready to proceed.
- Select a calibration type "X/Y scale" & units in millimeters.
- Open the spreadsheet view by pressing Control+Shift+V,
- Select the first cell of an empty row and type "Cross" to create a cross structure. This will open a cross structure property window.
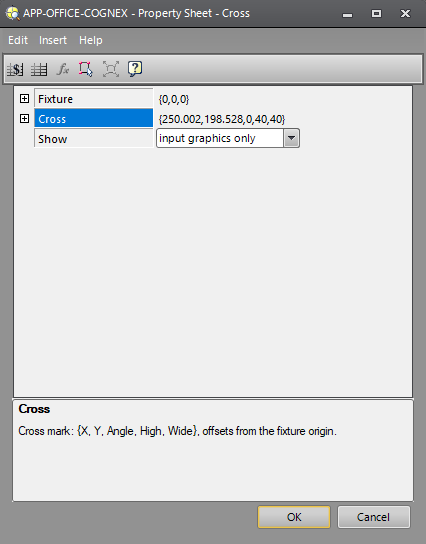
- Double click on the word "Cross" to open the image and place your cross. Place it on the bottom left hand corner of a central 10mm box. Zoom in to ensure accuracy.
- Press enter to return to the spreadsheet view.
- Repeat steps 9 and 10 until all four corners of a box have cross points on them.
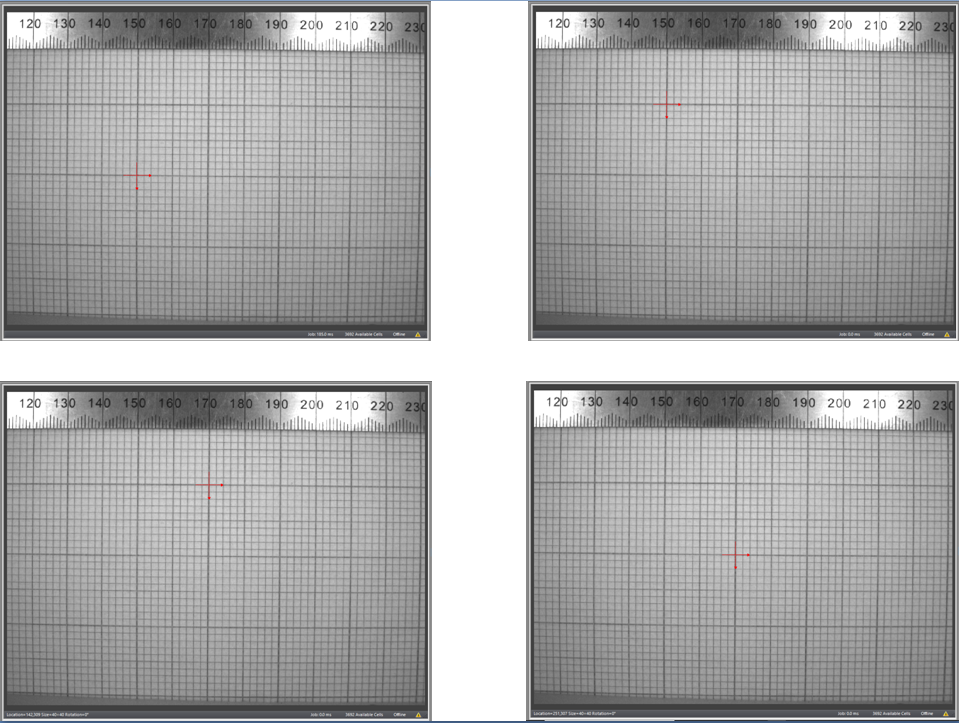
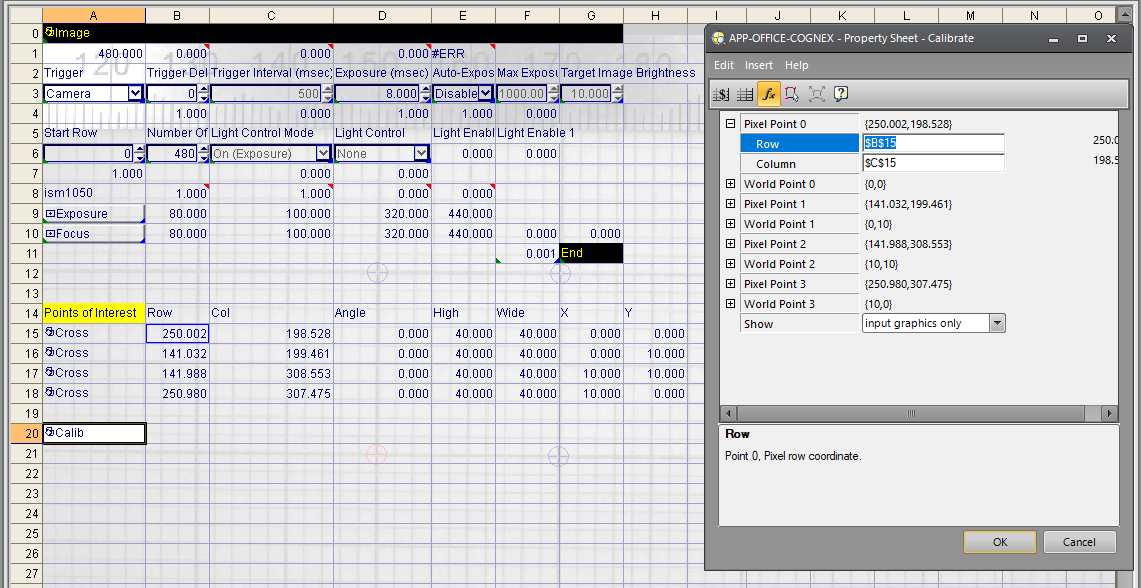
- Then, in the spreadsheet builder add two columns to the right of the cross sections. Enter the locations in mm of these points. According to the picture in step 12 the locations are (X,Y): (0,0) (0,10) (10,10) (10,0).

- Select a new first cell in an empty row and type "Calibrate".
- Press enter to open a calibration property panel. Here you link up the Rows & Columns (Pixel Value Locations) to their real world mm locations on the square of interest.
- Select another first cell on an empty row and type "FindLine". Press enter to prompt a find line property window.
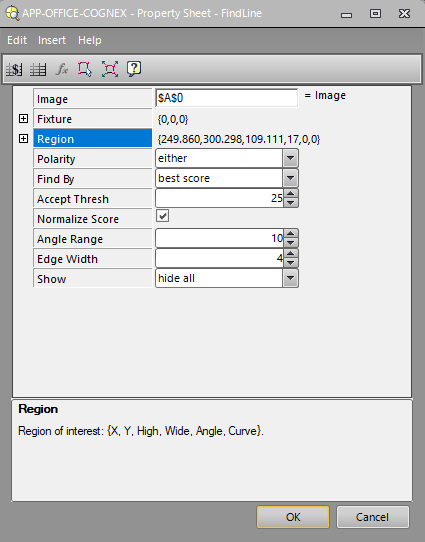
- Double click "Region" to select a region to look for the best clear straight line.
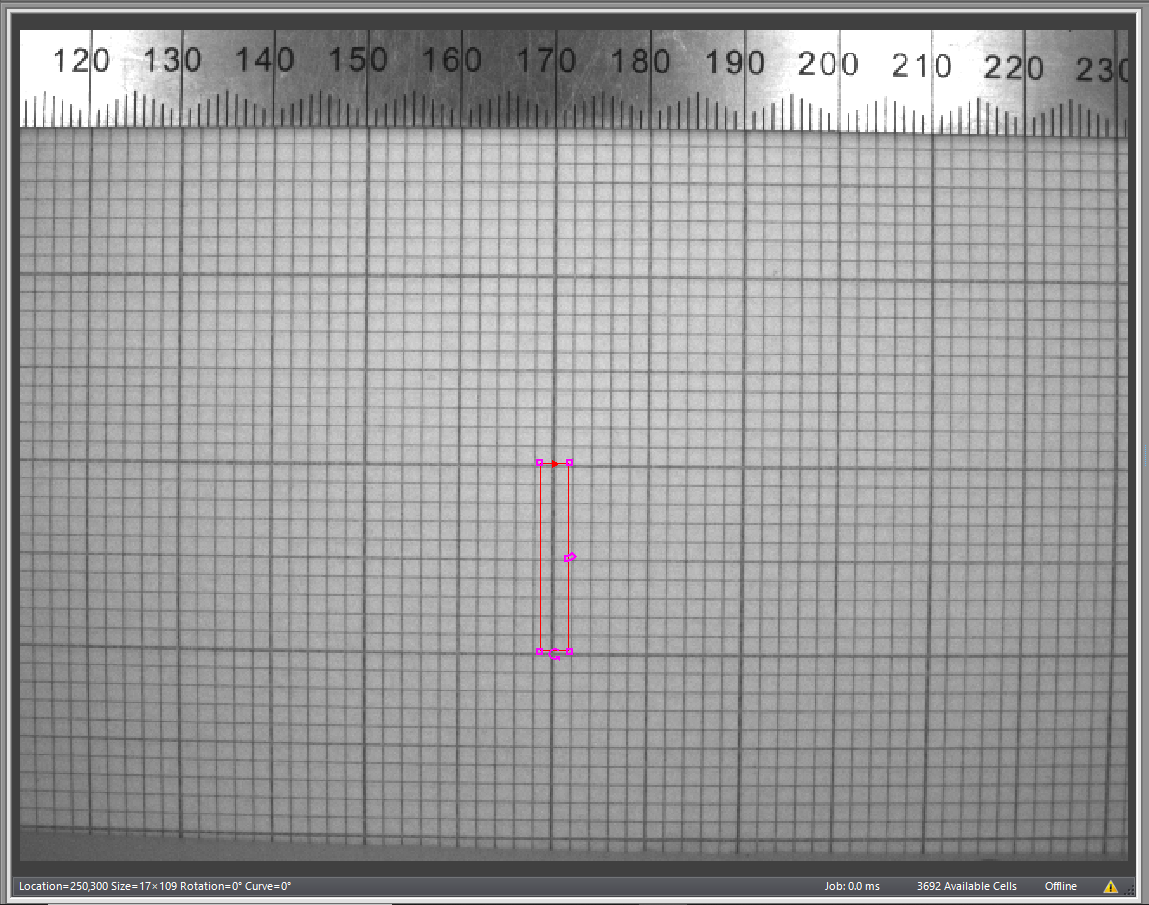
- Redefine your search radius until on 10mm cline segment is chosen. I have chosen a vertacle line which is processed left to right as defined by the red arrow. If you wanted a horizontal line you would need to change the polarity of this red arrow to top to bottom or vice-versa.
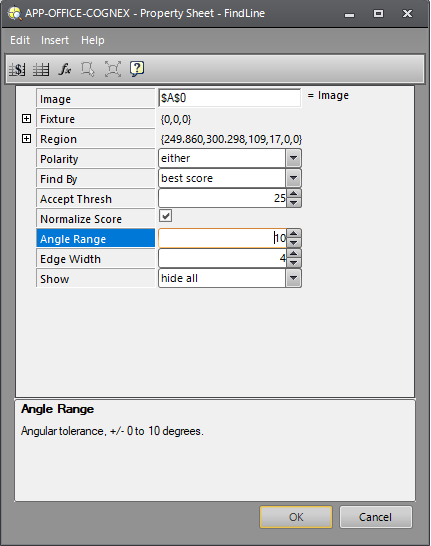
- Alter angle ranges, edge widths and acceptance thresholds if necessary to find a clear line.
- Press OK and return to the spreadsheet builder. This lone now has two endpoints (Row0,Col0) and (Row0,Col0).

- Select another first cell on a clear row and type "TransEdgesToWorld". Press enter to open a TransEdgesToWorld property window. This will ask for the location of the calibration structure cell and the location of the edges structure cell.
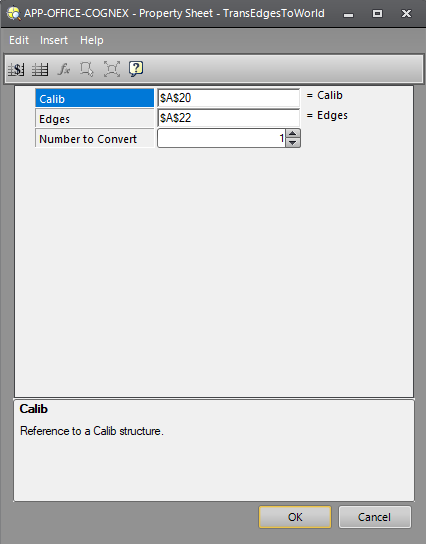
- Select the cell of the calibration structure and the cell which holds the FindLine structure. Press ok to return to the spreadsheet view.

- Select another first cell on a clear row and type "PointToPoint". Press enter to open a point to point measurement window property window. This will preform a mm measurement of the line found above.
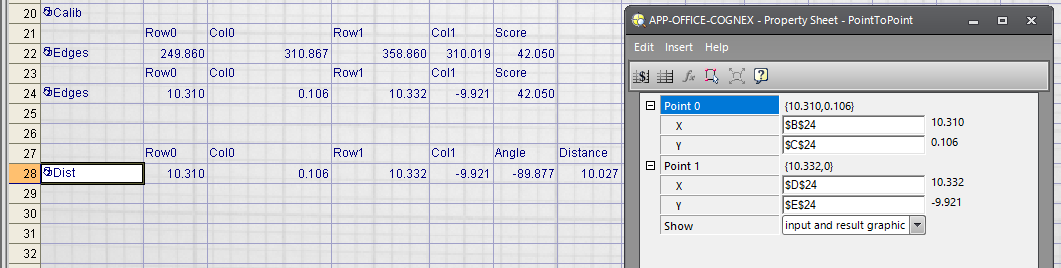
- Select the cells for the two endpoints of the line in the trans edges to world structure. Press OK and observe the distance measurement.
- Finally, manually compare this distance measurement to one done with your own facilities calibrated and verified measurement equipment.
Conclusion:
Manually calibrating a cognex camera to produce real world engineering units has a multitude of different applications and this blog demonstrates how you would go about getting such values.