
Linking DeltaV to a Siemens S7-1500
Objective:
The overall objective of this blog is to demonstrate and guide a user who wants to use a DeltaV signal / Tag to control a Siemens tag in TIA. This is achieved through use of Kepware OPC, OPC Expert and LinkMaster.
The example used here is one of a solenoid valve. The DeltaV signal "Valve_CM_1_11/singnal_in" will determine the ON/OFF logic of the valve wired to a S7-1500. I will discuss in detail the requirements for setting up communications and Kepware tags for both DeltaV tags located on a VM and TIA tags located on another PC on the network.
Procedure:
The process can be summarized in 5 major parts.
- Set up Siemens S7-1500 Tags in Kepware
- Facilitate OPC communications for DeltaV OPC server with OPC Expert.
- Set up a DeltaV tag in Kepware
- Install LinkMaster
- Create a link to map the signals together
-
Set up a Tag on Kepware which represents a Siemens S7 signal tag.
- Open Kepware configuration. In project select “Connectivity and then “New channel”.This will open the channel wizard.
- Select the type of communications driver the device is using. Select next to confirm.In this case choose “Siemens TCP/IP Ethernet” select “Next” to confirm.
- Then name the channel appropriately. Select “Next”

- Select the name of the network adapter. Select “Next”.

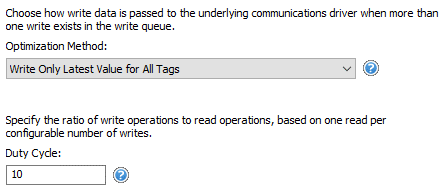
- Select the ratio of read / write operations. Select “Next”.
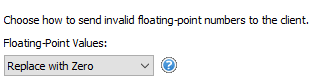
- Select how kepware deals with Null values. Select “Next”.
- Select a port number (Leave as default). Select “Next”.

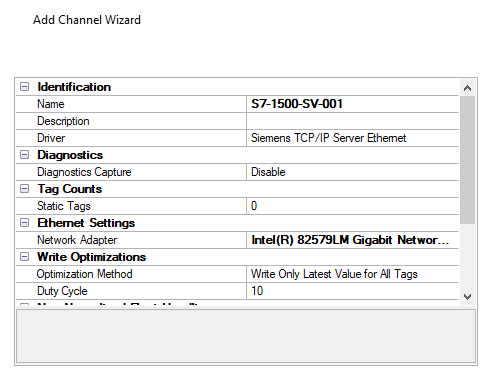
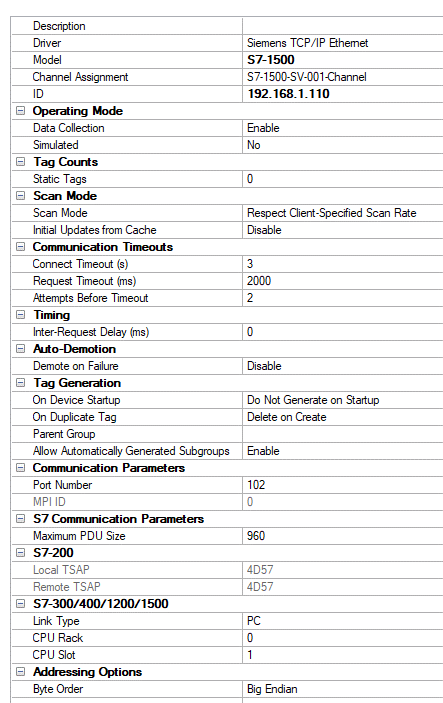
- Review your channel settings and compare them to the following. Ensure the driver type is correct.
- Then under your new channel there will be an option to add a device. Select it.
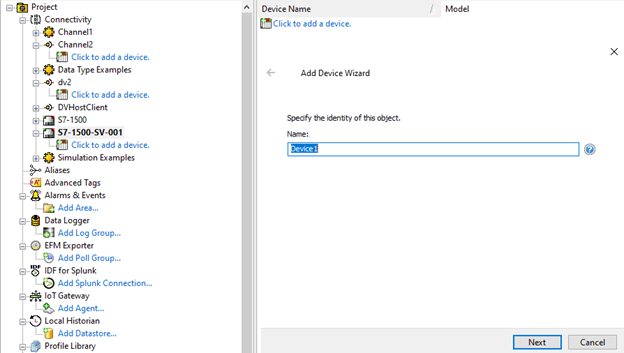
- Name your device appropriately and select next.
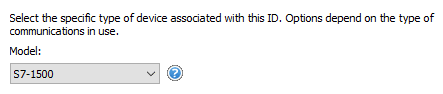
- Select the model of plc it is targeting.
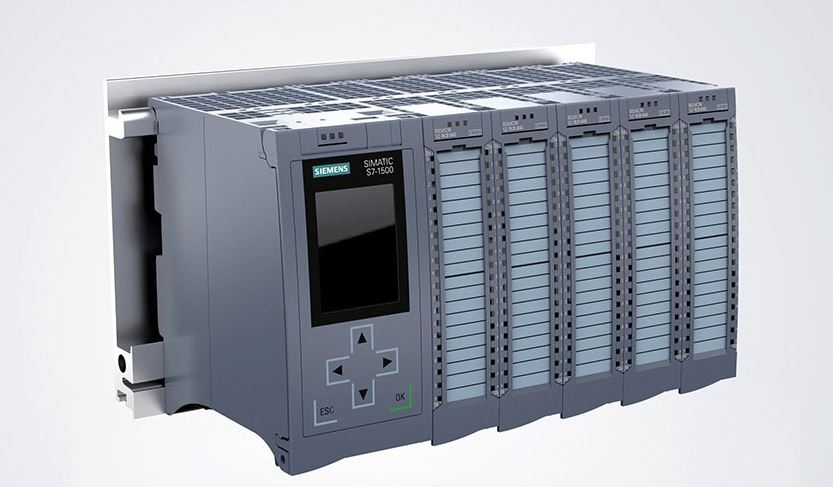
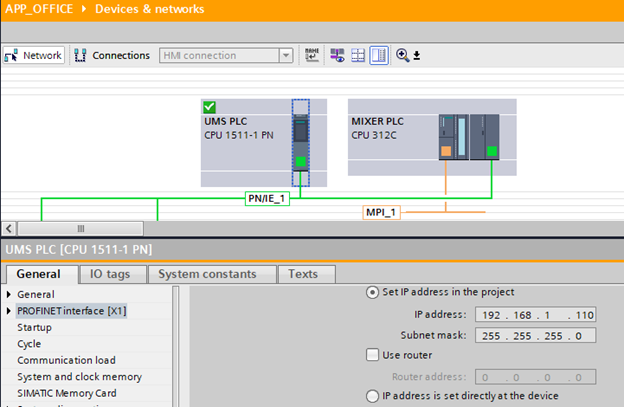
- Next you will need to confirm the IP address of the PLC. In TIA you can find this by selecting the PLC in question in device configuration and browse the device to Profinet interface and then to "IP Protocol".
- Specify the device’s driver specific node. Select “Next”.

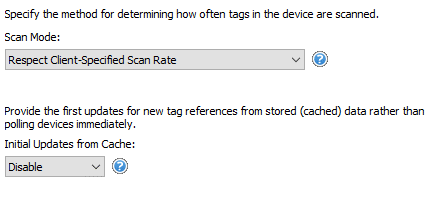
- Select the scan rate and disable initial updates from Cache. Select “Next”.
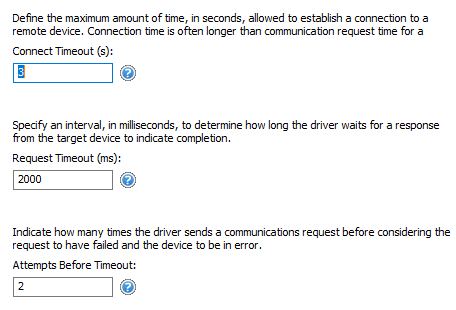
- Set connection time out values (Default).
- Set how Kepware reacts to communication failures. (Default). Select “Next”.

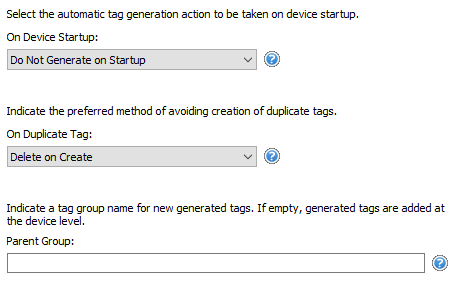
- Set how Tag generation settings. (Default). Select “Next”.
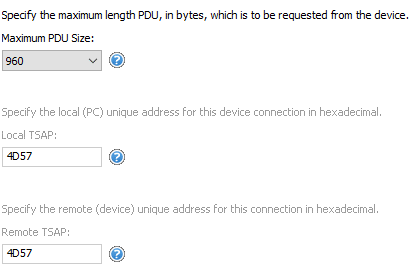
- Set packet sizes. (Default). Select “Next”.
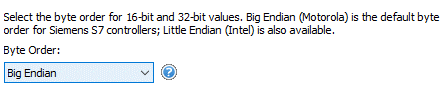
- Set Byte order. (Default). Select “Next”.
- Review selected settings. Select “Next”. Notice the rack and slot numbers. You can view these within the architecture found in TIA or equivalent.
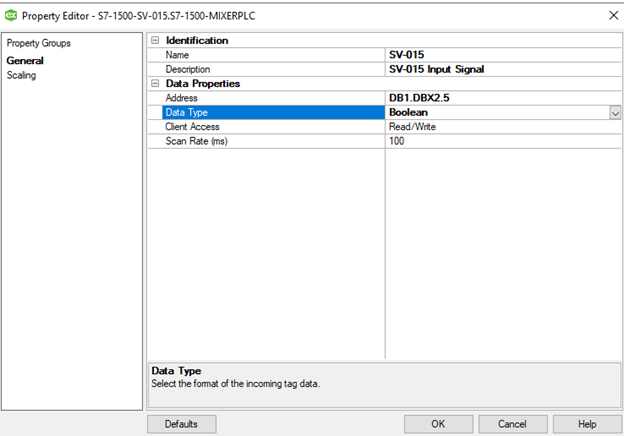
- Verify the address in TIA of your signal Tag. Notice that the address for SV-015 is DB1.DBX2.5 and its data type is a Boolean.

- In Kepware, with the device name selected you will be prompted to add a tag with “Click to add a static tag...” select that and name your tag appropriately. Select ok and confirm your tag creation.
-
Run OPC.Expert.exe to create DeltaV>Kepware tunnel / connection
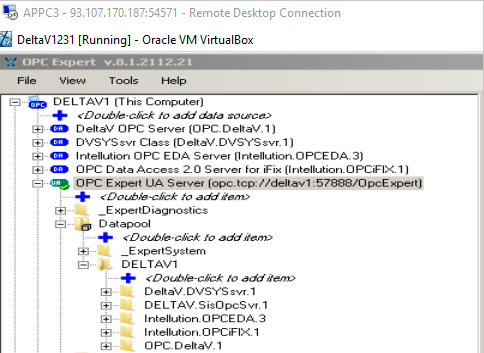
- On the VM or where the DeltaV OPC server is located run OPC.Expert.exe. https://opcexpert.com/Running this with enable built in OPC tunneling that enables transfer of OPC data by a mechanism other than DCOM. Notice the creation of OPC Expert UA server with the address “opc.tcp://deltav1:57888/OpcExpert”.
Note: This will create a tunnel which uses only one port with no callbacks. OPC Expert does not require installation and it doesn’t change the windows registry so it is considered safe to run on audited systems in that regard.
- Browse to a desired signal / tag inside of this OPC Expert UA Server tree.
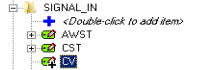
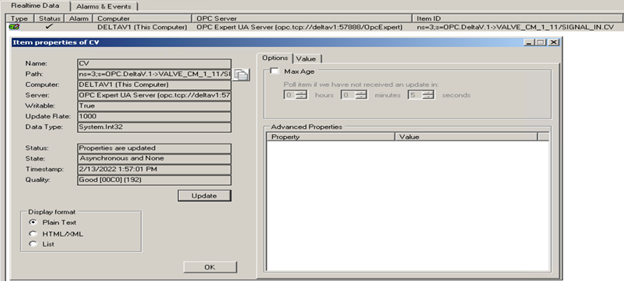
- Select a the desired signal value. In this case CV (Current Value) for a Signal_In input parameter for a solenoid valve. Double click to add this signal to the right most panel.
- Right click this signal and select properties to view the property panel.
- Select the “Copy” icon beside the tag path. Paste this address somewhere for reference later on the host machine when creating the Kepware tag for the DeltaV signal.
-
Create a tag on Kepware which will represent the DeltaV signal.
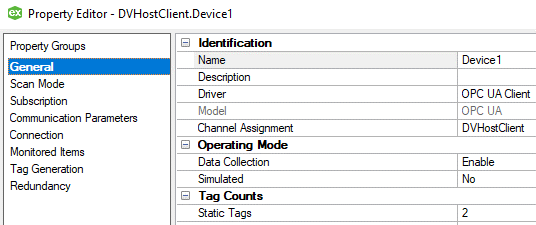
- Now create the Kepware Tag for the DeltaV signal. Start by creating a new channel.
- In General name it and assign it the OPC UA Client driver.

- Leave write optimizations as default.

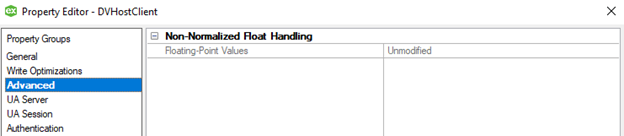
- Leave Advanced as default.
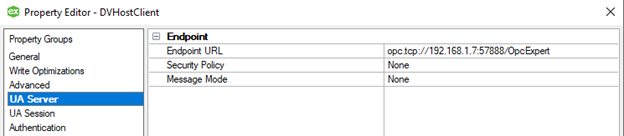
- In UA Server enter the endpoint URL set in the OPC Expert and set the security policy to none.
- Leave UA Session as default.

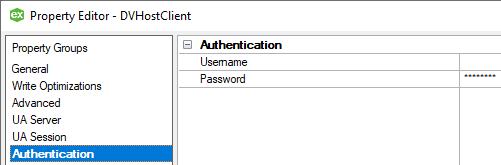
- Leave Authentication blank with no username or password.
- Add a device to the channel. Leave as default.

- Select “OK” to confirm channel creation.
- Right click on the device name and select add new tag.
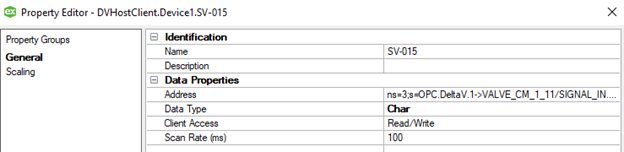
- Set an appropriate name, address and data type for the tag. The address for this tag was found in the OPC Expert earlier.
-
Use LinkMaster to Map signals together
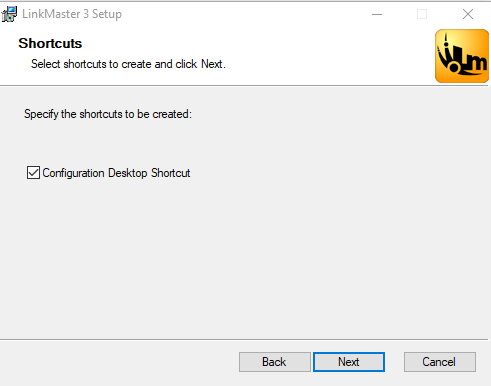
Install LinkMaster on the Host machine
- Download and install LinkMaster on the Host machine
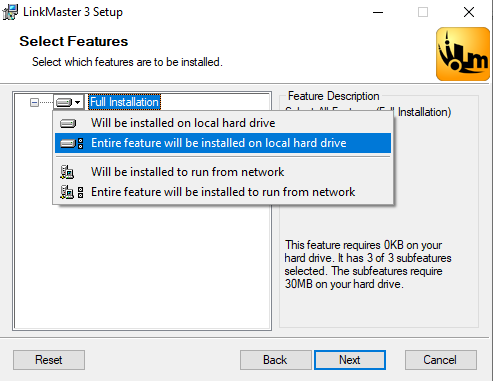
- Select “Entire feature will be installed on local hard drive”.
- Run the application it will scan the local machine for OPC servers
-
Create a datalink between the DelatV input signal and the Siemens TIA signal.
- Launch LinkMaster
- Select the group panel (Bottom left) and right click. Select “New Link Group”.
- Name the group where your datalinks will reside
- Set the server update & client I/O refresh rate. (Leave as default)
- Enable Link Transfers check box
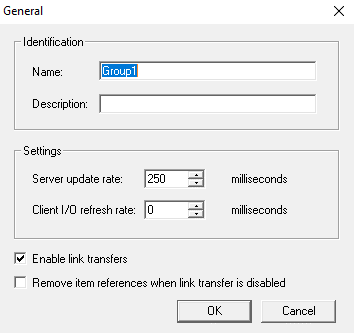
- Click “OK” to confirm.
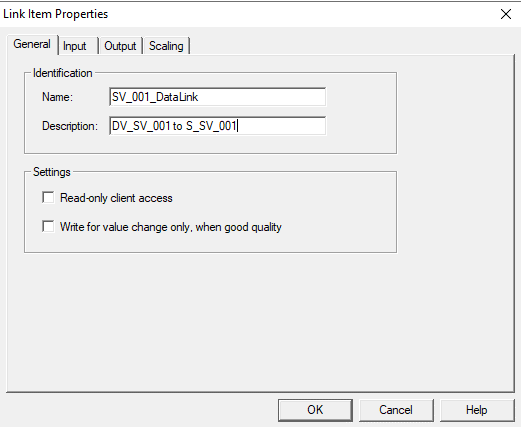
- Rightclick this group name and select “New Link” to add a new datalink.
- In General Name and describe your link appropriately. In this example I am linking a Signal_In value in deltaV to a Siemens TIA TAG. The signal Name will be SV-015. The goal again is to open a valve from DeltaV which uses Siemens tags.
- Next in input, browse to the DeltaV input signal. Under Server name select “Kepware.KEPServerEX.v6. The Item Id you want to browse to Kepware.KEPServerEX.V6>DVHostClient>to your tag of choice. In this case “SV-015”.
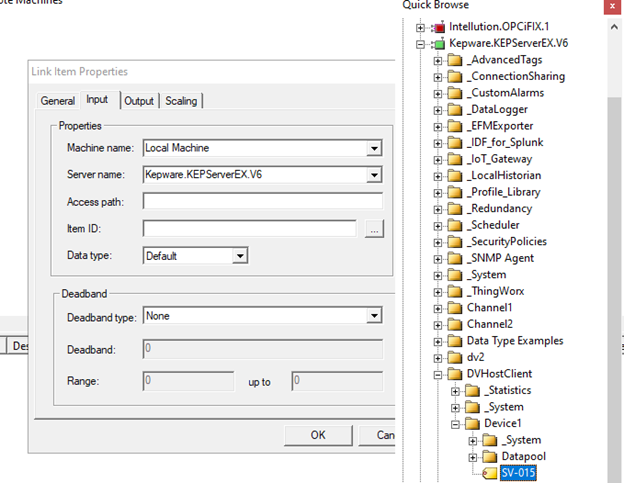
- Double click this tag to select it.
- Next, open the Output panel. Set the actual address of the physical IO. Under the Kepware.KEPServerEX.V6 directory browse to the channel and tag of choice.

- Select “OK” to confirm datalink creation.
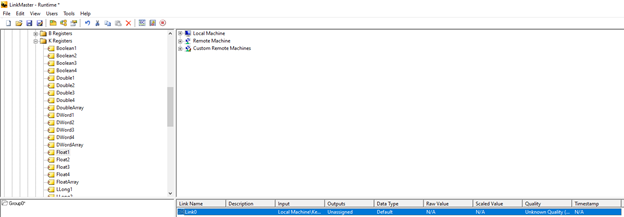
- Now test the functionality of the data
- If all services are running and not out of the demo period of around 2 hours your datalink will look like this. Notice “Quality Good”. If not, restart OPC expert on the VM, Kepware and then datalinkmaster on the host.

- Toggle the DV input from DeltaV to prove IO Changes.

